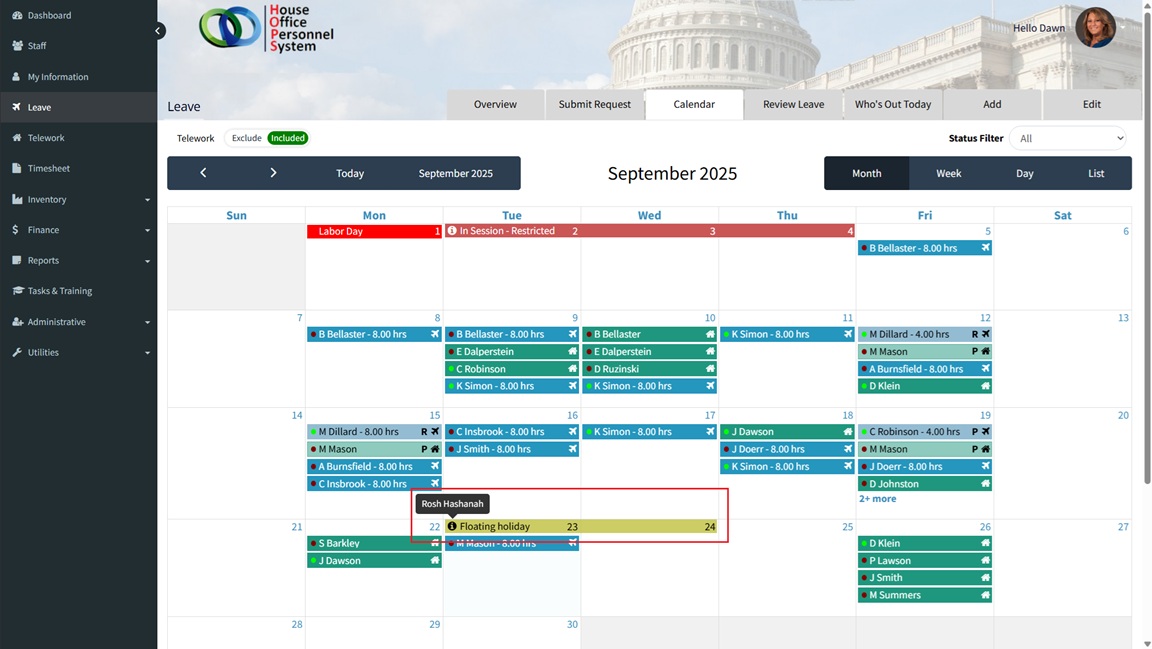
Leave Calendar
The calendar provides information related to staff absences, scheduled telework, office closures, events, and restrictions for utilization of paid time off (PTO). The calendar can be accessed by selecting [Leave -> Calendar (tab)] from the left navigation menu. The calendar is only visible to staff that have been granted access.
The display of the calendar includes:
1. Approved Leave & Telework: Leave & telework that has been approved.
2. Pending Requests: Requests for leave that are awaiting/pending approval.
3. Holiday and Admin office closures.
4. Calendar Events: Notations that display on the calendar.
5. Calendar Restrictions: Calendar events that additionally include restrictions for requesting leave.
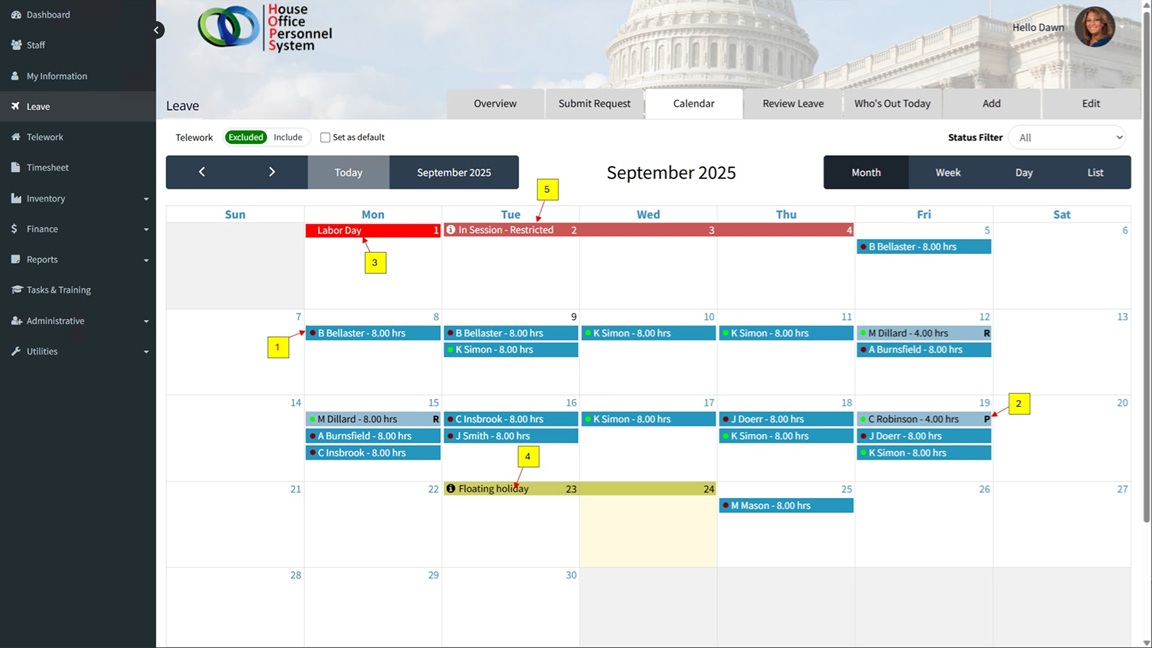
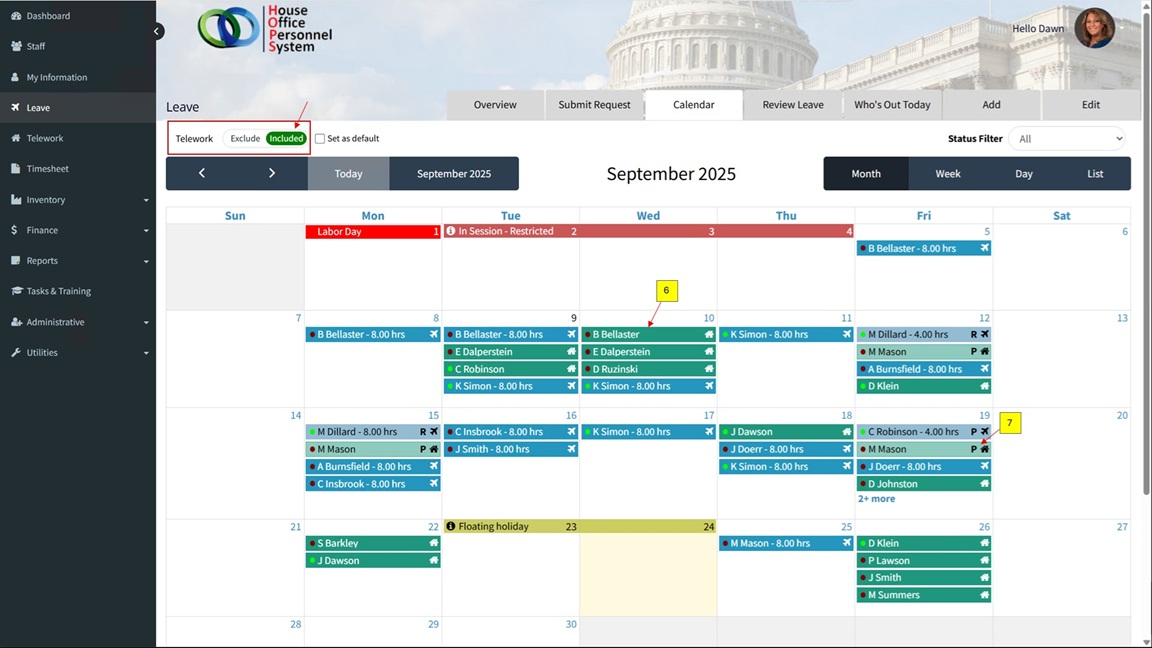
Optional: Telework can be displayed on the leave calendar.
6. Approved telework: Telework that has been approved
7. Pending telework: Telework that is pending approval.
The leave calendar allows reviewers to view the requests for leave that they approve, and take action on those requests. This allows reviewers to see leave that has already been approved from the dates requested and take action (Approve or Deny) based on coverage for those dates.
Calendar Status Filter:
The leave status filter allows users to select the leave to display on the calendar based on the status that has been selected.
There are 4 statuses to select from:
- All – Displays all leave (Approved, Pending, and Requires My Action).
- Pending (P) – Displays pending requests for leave. Includes Requires My Action as they are also pending requests.
- Approved – Displays leave that has already been approved.
- Requires My Action (R) – Displays pending requests that require the action of the logged in user.
The leave entries are visually represented by color and codes. The colors for Approved, Pending, and Requires My Action can be modified to suit your office preference.
Status Codes:
The status codes identify the status of leave that is displayed on the calendar.
- (P) – Pending requests – Requests that they are in the chain of approval for, but are not yet scheduled to approve.
- (R) – Requires My Action – Leave requests that the are ready for approval by the logged in user.
If no code is displayed, the displayed item is ‘Approved’.
Status Colors:
The status of leave displayed on the calendar can also represented by color differentiations, which allow users to visually identify the status of the leave displayed. The status colors can be adjusted in System Settings.

Review Leave/Telework Requests
Reviewers are able to review leave and telework (optional) requests from the calendar. The requests that ‘Requires My Action’ are represented with an (R). Requests that are ‘Pending’ are displayed and identified with a (P).
When are reviewer selects/clicks on a request, a window with the request details will display. The reviewer will be able to select a green checkbox to approve the request, or a red ‘x’ to deny the request.
Once approved, if the reviewer is not the ‘Final’ reviewer of the request, the status will change from (R) Requires My Action to (P) Pending, which indicates that the request will need to be approved by additional reviewer(s) before it is finalized.
Requests that span multiple dates will be grouped together and will highlight when the mouse is moved over the request.

Note: If the reviewer is a ‘Leave Administrator’, they have the ability to approve on behalf of other reviewers, and may approve requests that are in a ‘Pending’ status. Standard reviewers may only approve requests that are in a (R) ‘Requires My Action’ status.
If a reviewer prefers (and has access), leave can also be approved using the ‘Review Leave’ tab.

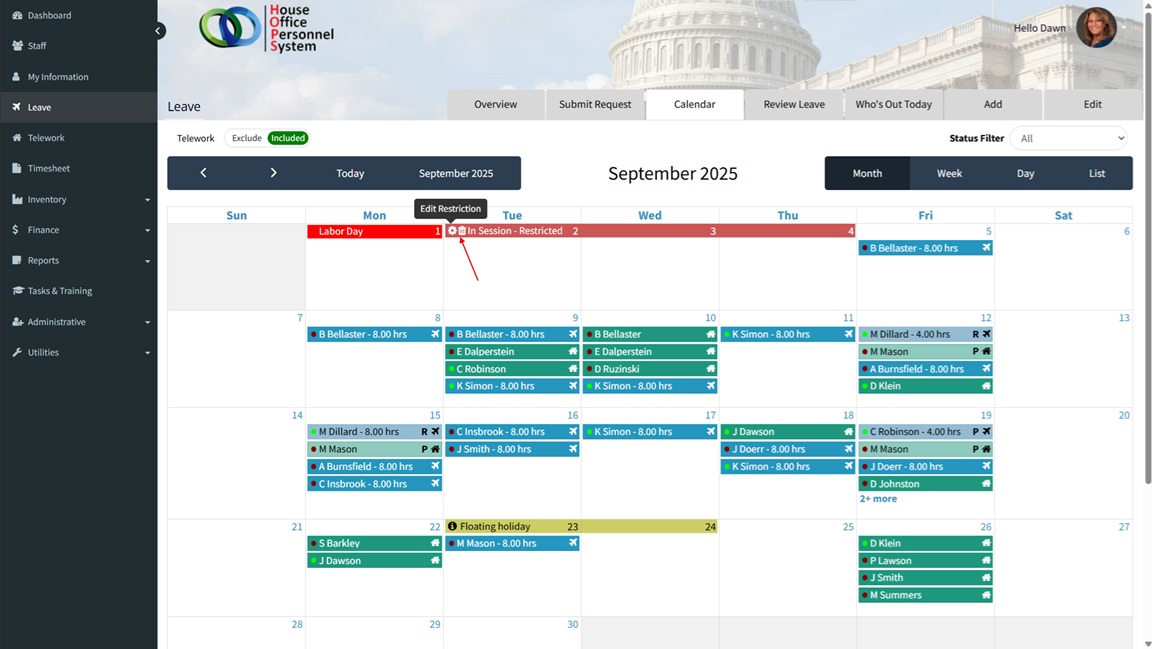
Calendar Events & Restrictions
Administrative users can add events to the calendar. The events can optionally include restrictions that prevent the submission of requests for time-off during the selected period. The events are visible to all users that have access to view the leave calendar.
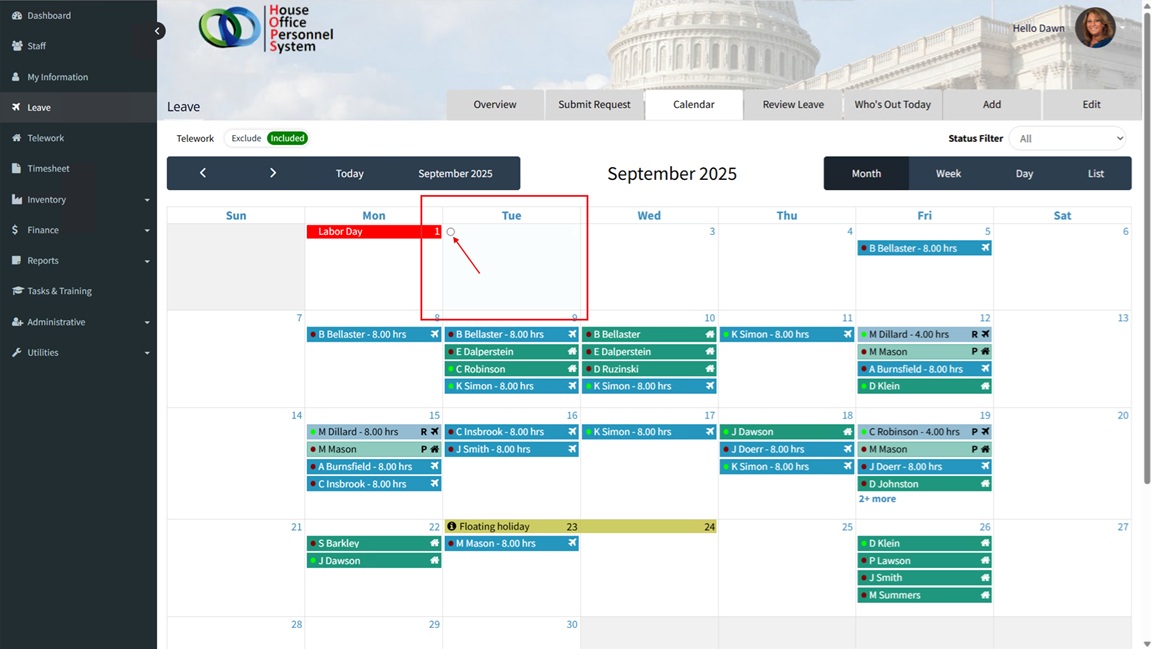
Create a Calendar Event
The first step is to select/click a date on the calendar that will be included in the new event (i.e. 9/23). When a date has been selected, a selectable circle will appear in the upper left corner of the selected date. Click the circle to initiate adding of the new event.
After the event creation has been initiated, a screen will display with the fields that are used to create the event. Follow the steps below to add the event to the calendar.
- ‘From Date’ & ‘To Date’* – Select the beginning and end dates for the event. If the event is a single day, the ‘From’ and ‘To’ dates will be the same.
- ‘Event Name’* – Add the name of the event. This is the text that will display on the calendar.
- ‘Description’ – Add additional description details of the event. The details are visible to a user when they hover/mouse over the (i) icon left of the event name.
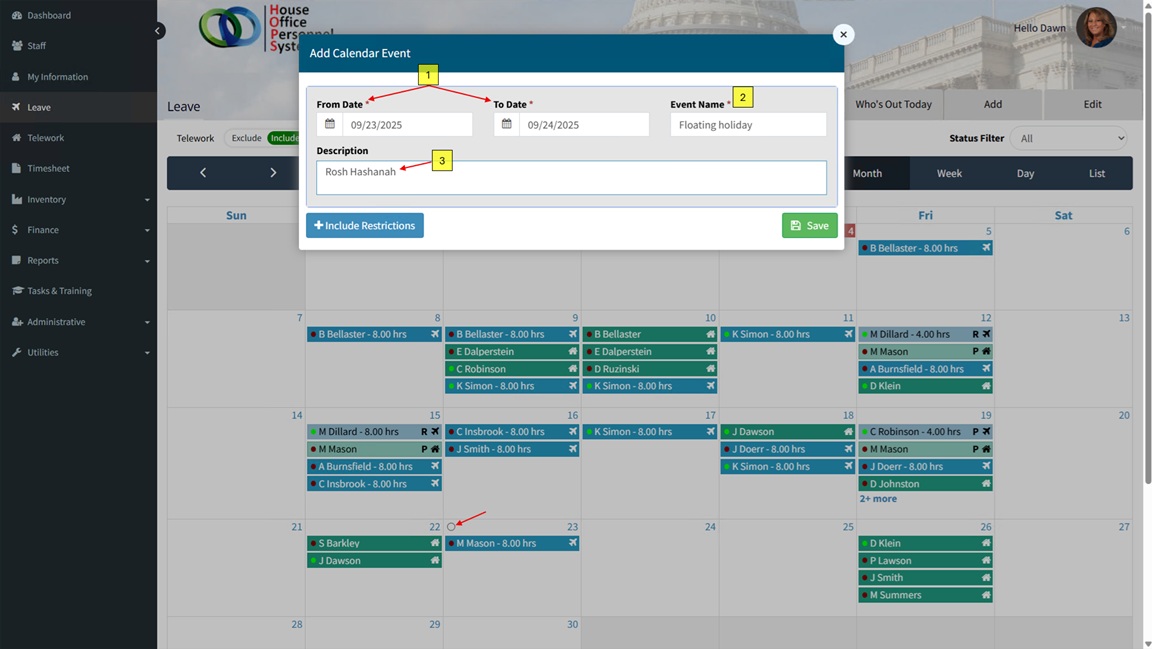
When all information has been entered, click the ‘Save’ button to create the event. The event will then display on the calendar for the dates that have been added.
The details text will display when hovering over the (i) icon left of the event name.
Create a Calendar Event with Restrictions
Select/click a date on the calendar that will be included in the new event. When a date has been selected, a selectable circle will appear in the upper left corner of the selected date. Click the circle to initiate adding of the new event.
After the event creation has been initiated, a screen will display with the fields that are used to create the event. Follow the steps below to add the event to the calendar.
- From Date & To Date * – Select the beginning and end dates for the event. If the event is a single day, the ‘From’ and ‘To’ dates will be the same.
- Event Name * – Add the name of the event. This is the text that will display on the calendar.
- Description – Add additional description details of the event. The details are visible to a user when they hover/mouse over the (i) icon left of the event name.
- Include Restrictions – Click the ‘+ Include Restrictions’ button to display the parameters for restricting requests for time-off during the selected period.
- Restricted Leave Types – A selectable list of leave types that staff are restricted from requesting during the dates of the event being created. The default leave types that are selected for restriction can be modified in the System Settings.
- Restricted Staff – 3 options are available for restricting requests for time off.
a. Affected Staff – Allows for selection of individual staff to be restricted.
b. Departments – Allows for selection of departments that are restricted. Staff that are assigned to the selected departments are prevented from requesting time off.
c. Duty Stations – Allows for selection of duty stations/offices that are restricted. Staff who are assigned to the selected offices are restricted from requesting time off.
After setting all values, click the ‘Save’ button to create the event.

Note: A red asterisk * indicates that the field is required.
Edit an Event/Restriction
To edit an event/restriction, follow the steps below.
- Select/click the event on the calendar. This will display two icons in the upper left corner of the first date of the event.
- The options available are ‘Edit’ and ‘Delete’
– Edit: Select/click the gear icon. The settings will display, which can be modified/updated.
– Delete: Select/click the trash can icon. This will permanently remove the event.