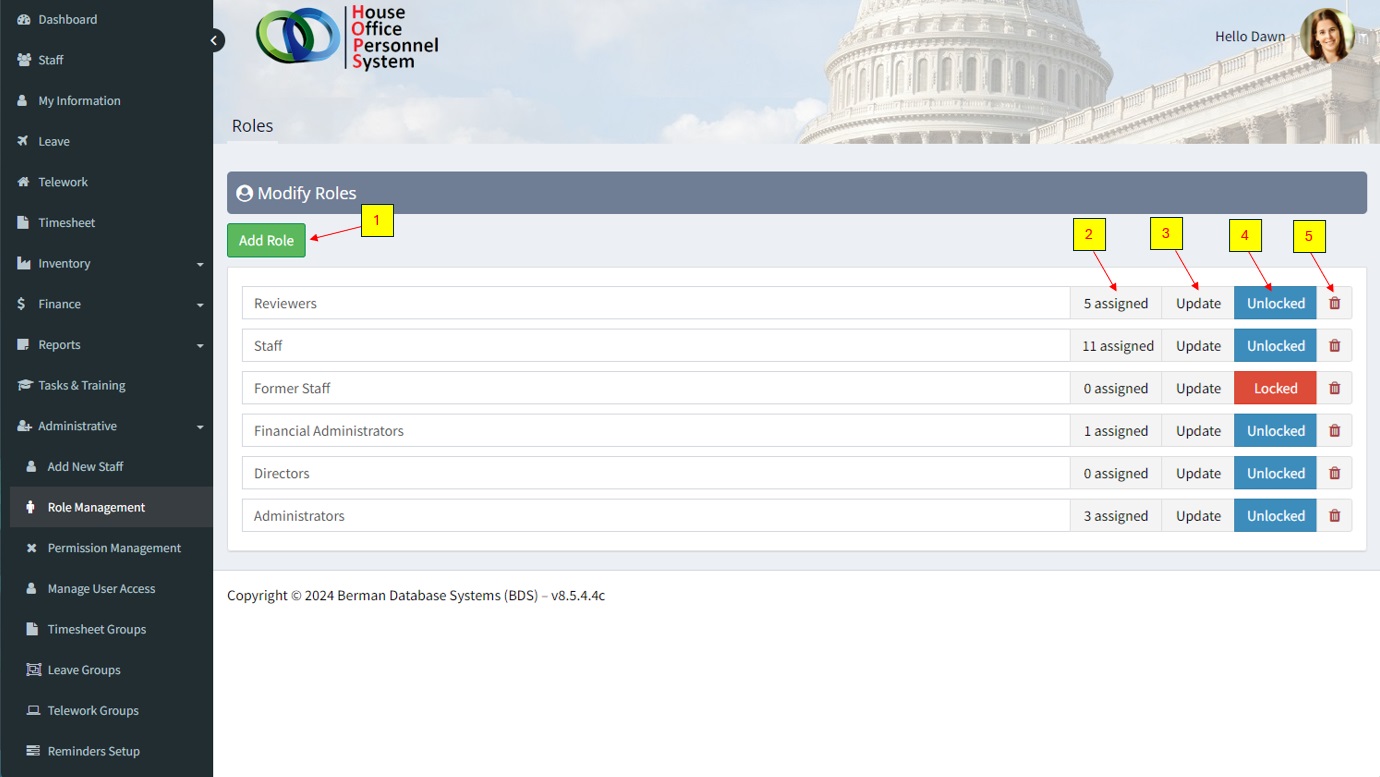
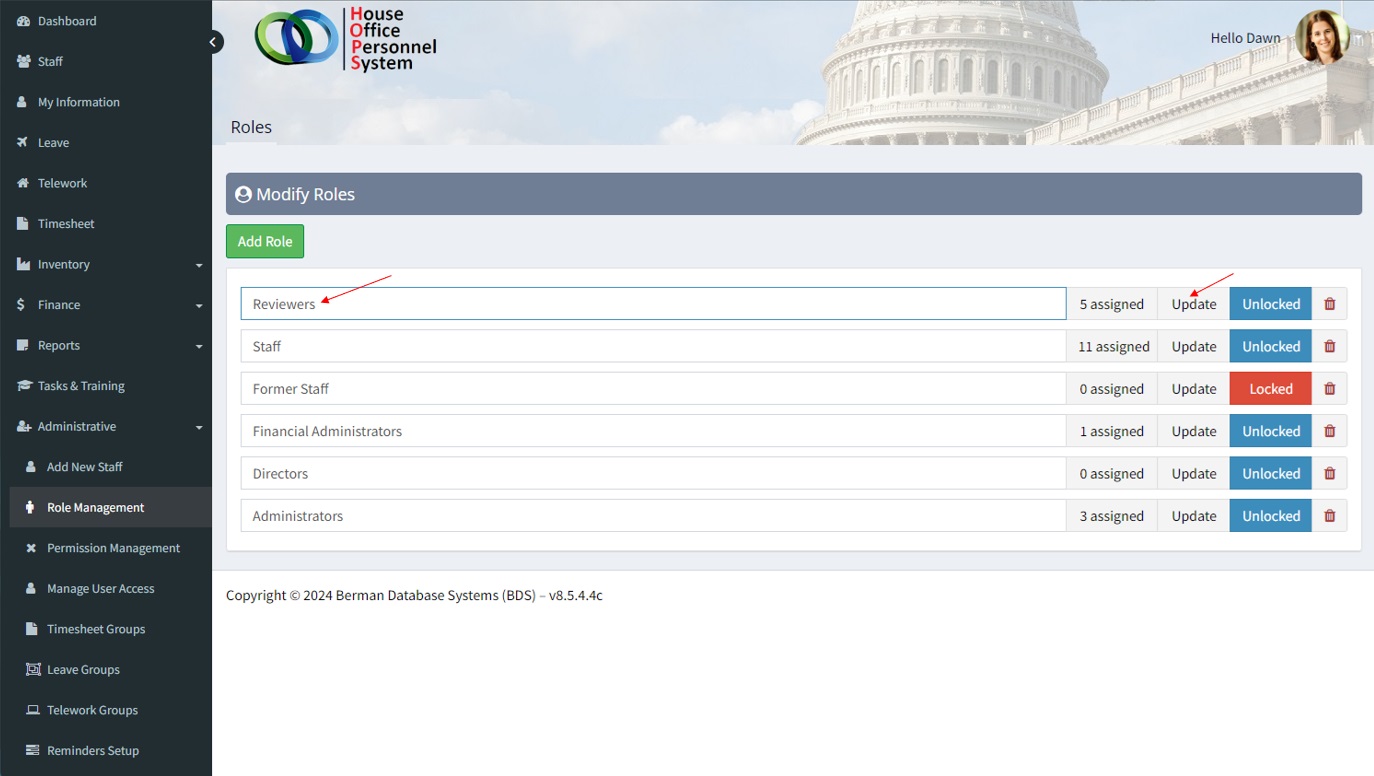
Roles are used to define permissions and assign access levels to the application to staff. This is done so users have access to what they need access to rather than having access to what they do not need. Administrators can navigate to this feature by going to the left navigation menu and selecting [ Administrative -> Role Management ].
Modifying the ‘Roles’ page has multiple functions:
- Add role – Creates a new role. Each role grants distinct permissions, ensuring appropriate access control and operational efficiency.
- Assigned Staff – The number of staff members who have been designated to that role.
- Update role – Used to update the role title.
- Lock role – This feature restricts a role from being selected on the ‘Manage User Access’ page, ensuring that it cannot be assigned until unlocked.
- Delete role – This action removes a role from the list of available roles. However, the role cannot be deleted until all staff members are unassigned from it.
Create a new role
From the left navigation menu and select [Administrative -> Role Management].
- Click on the ‘Add Role’ button.
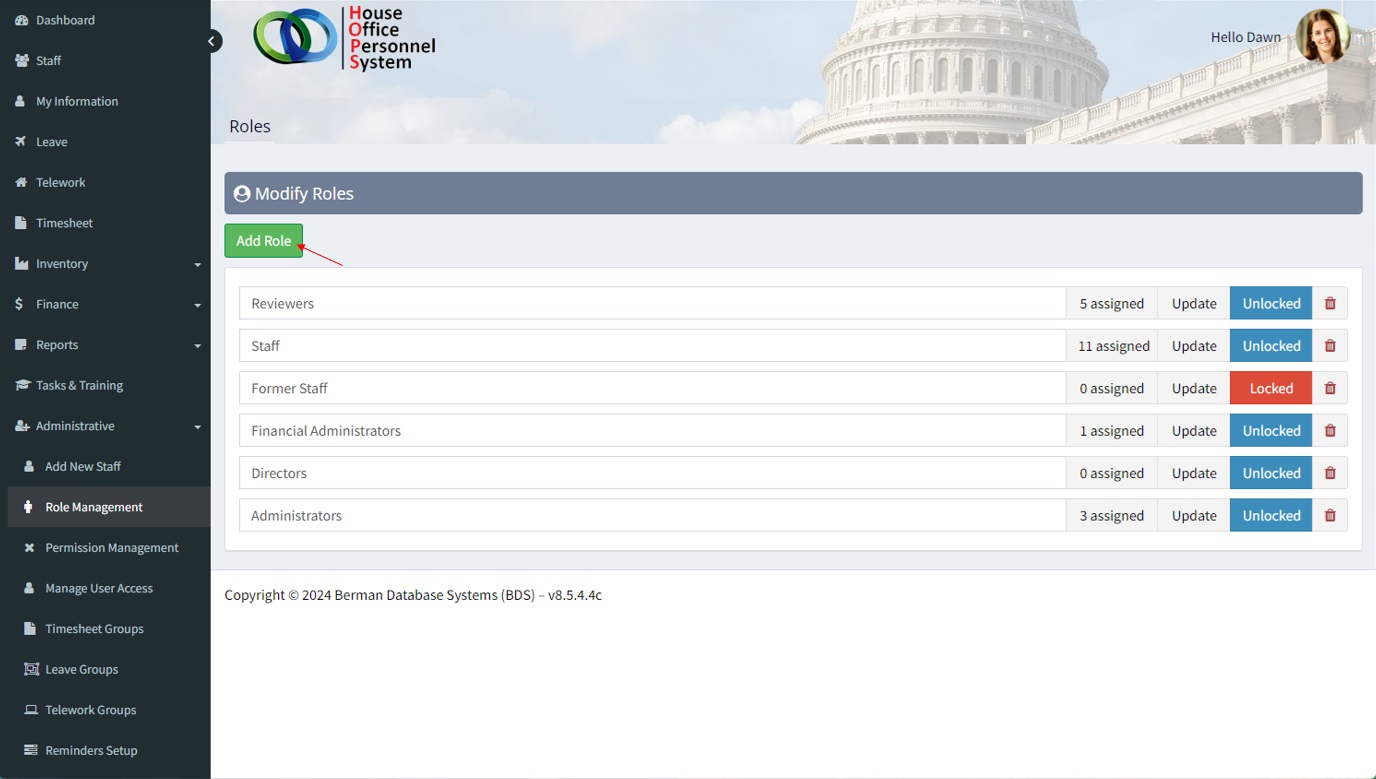
2. A pop-up window will appear, prompting the user to enter a title for the new role.
3. Click the ‘Save’ when done.
The new role will be displayed on the list of roles.
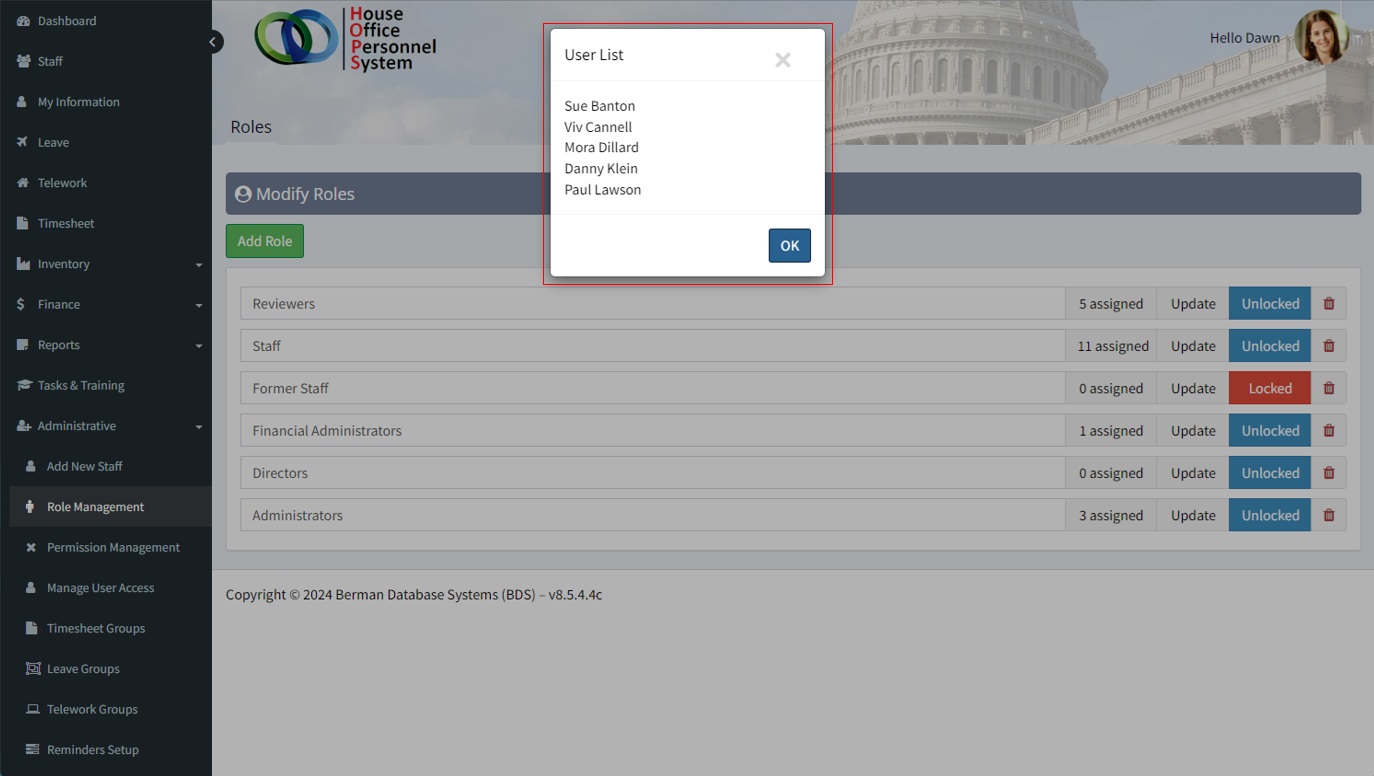
Viewing Assigned Staff
You can view staff that are assigned to a role by clicking on the button that says ‘assigned’ on the role’s header. Once you have clicked it, the list of assigned staff will be shown in a pop up box.
Update Role
You can edit the name of a role by clicking on the ‘update’ button.
Locking a Role
Locking a role restricts access of anybody who has access to the system through that role. Typically this function is used for system maintenance and to reassign former staff.
- Click on the box on the right side of the role header that says ‘Lock’. Red ‘Locked’ indicates that the role locked while blue ‘Unlocked’ indicates that the role is unlocked. Users in a locked role not be able to access their accounts via HOPS.
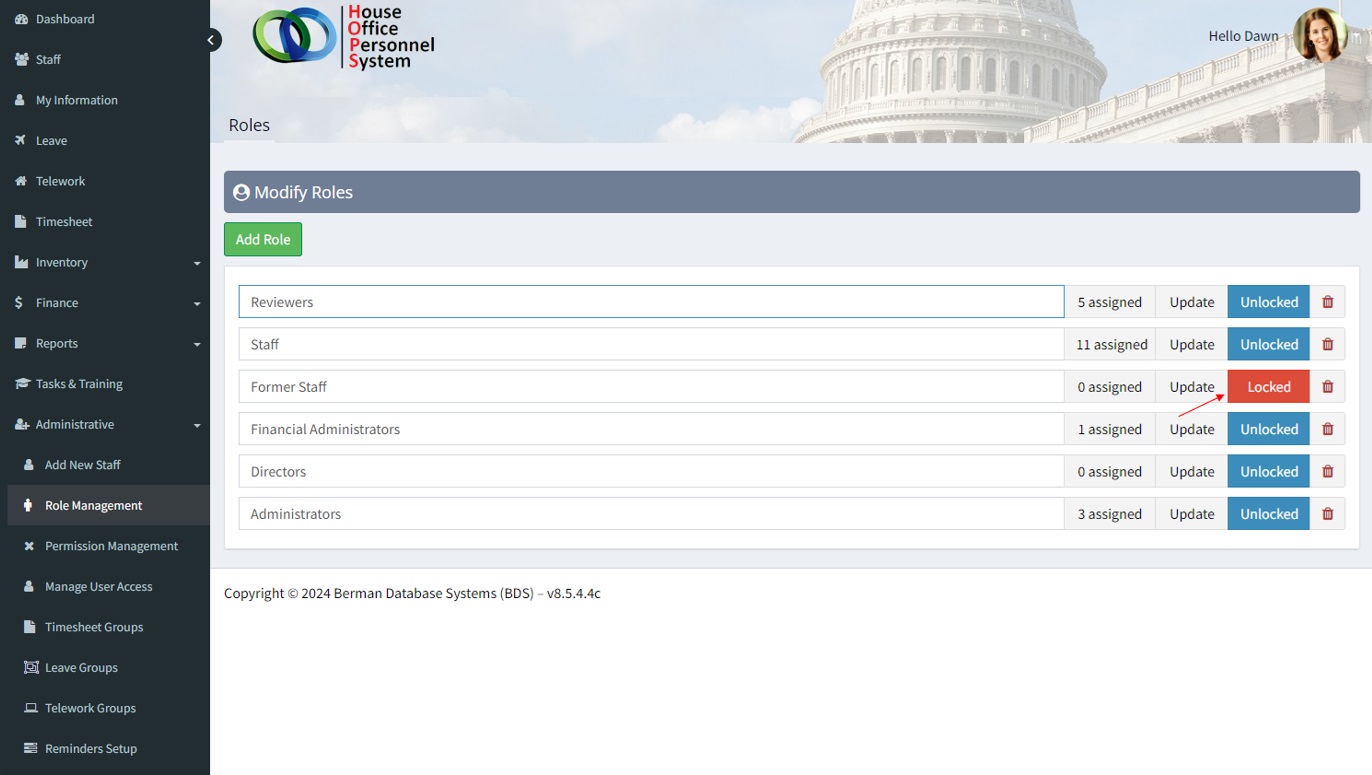
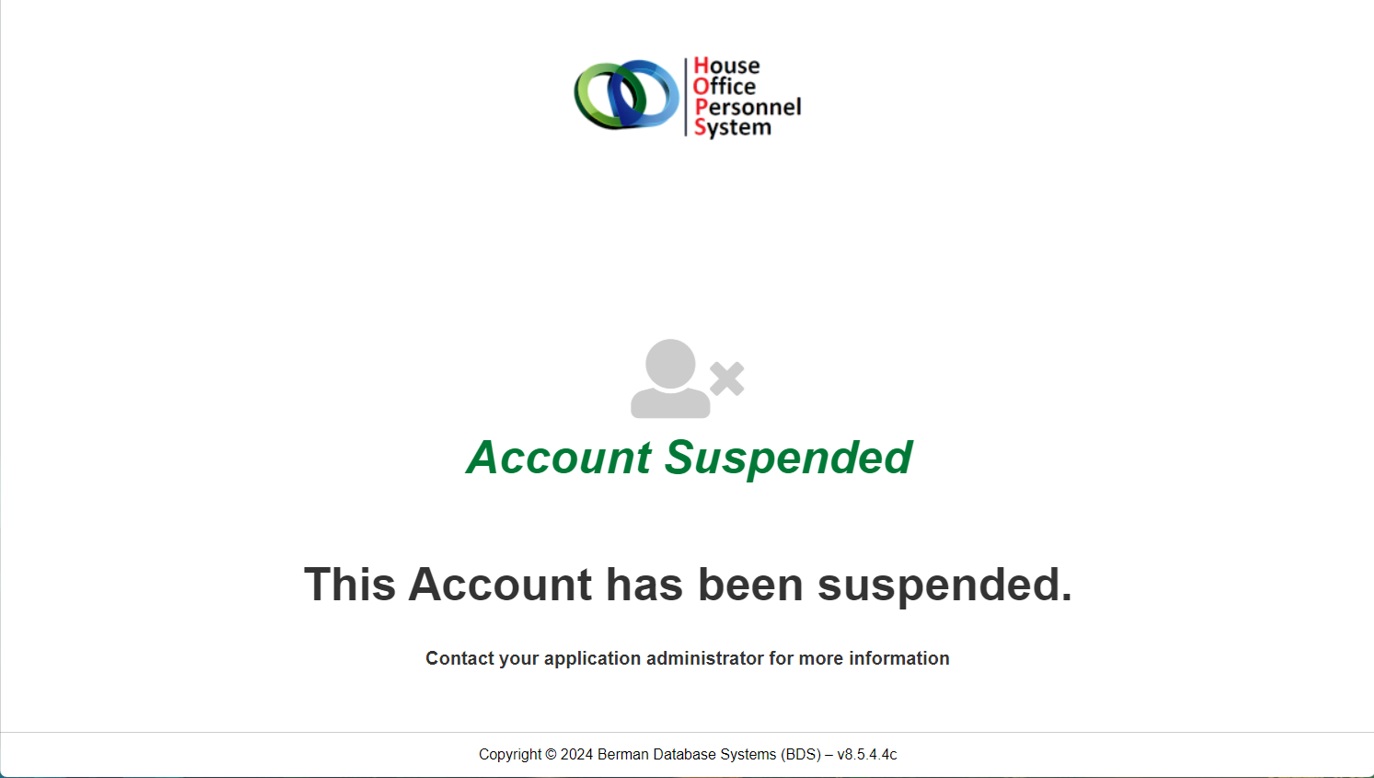
When the role is locked, any staffer assigned to that role will then have their account suspended. When they try to log in, they will be directed to the following screen.
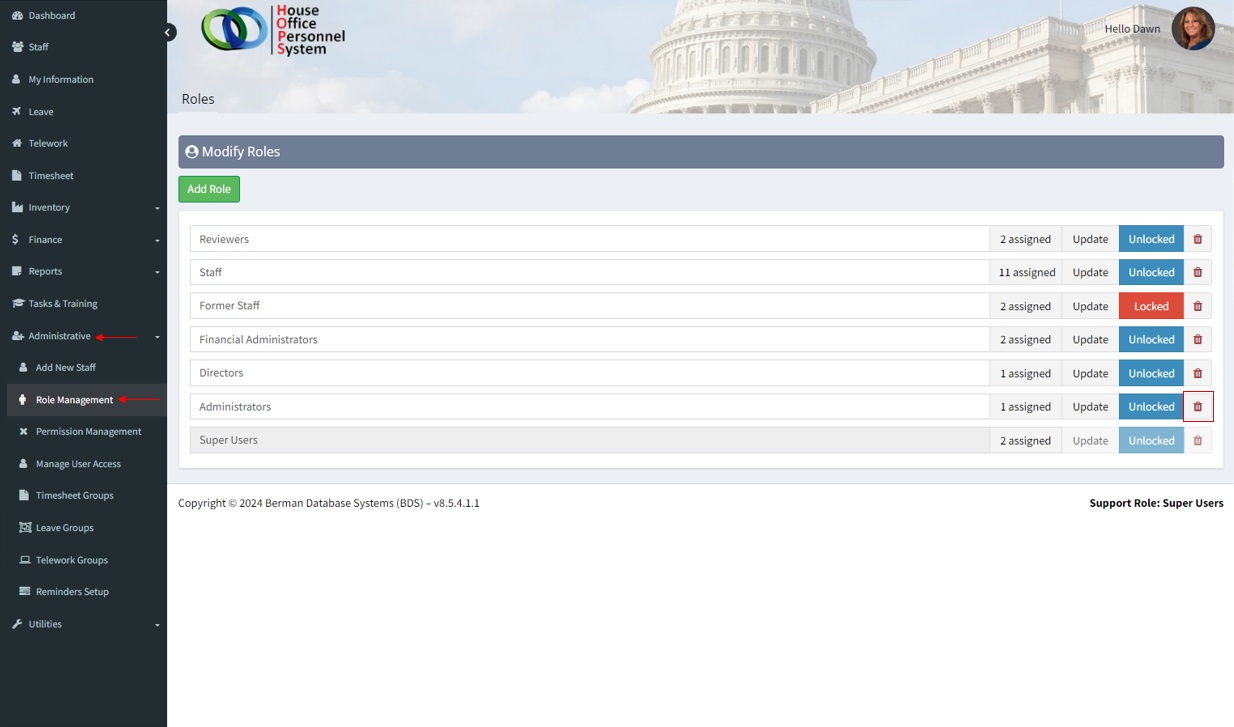
Delete Role
From the left navigation menu and select [Administrative -> Role Management].
- Click on the trash can icon on the right side of the header of the role you want to delete.
- You will be prompted to verify that you would like to delete this role. Click on the ‘Confirm’ button.
- The role will be removed from the list.
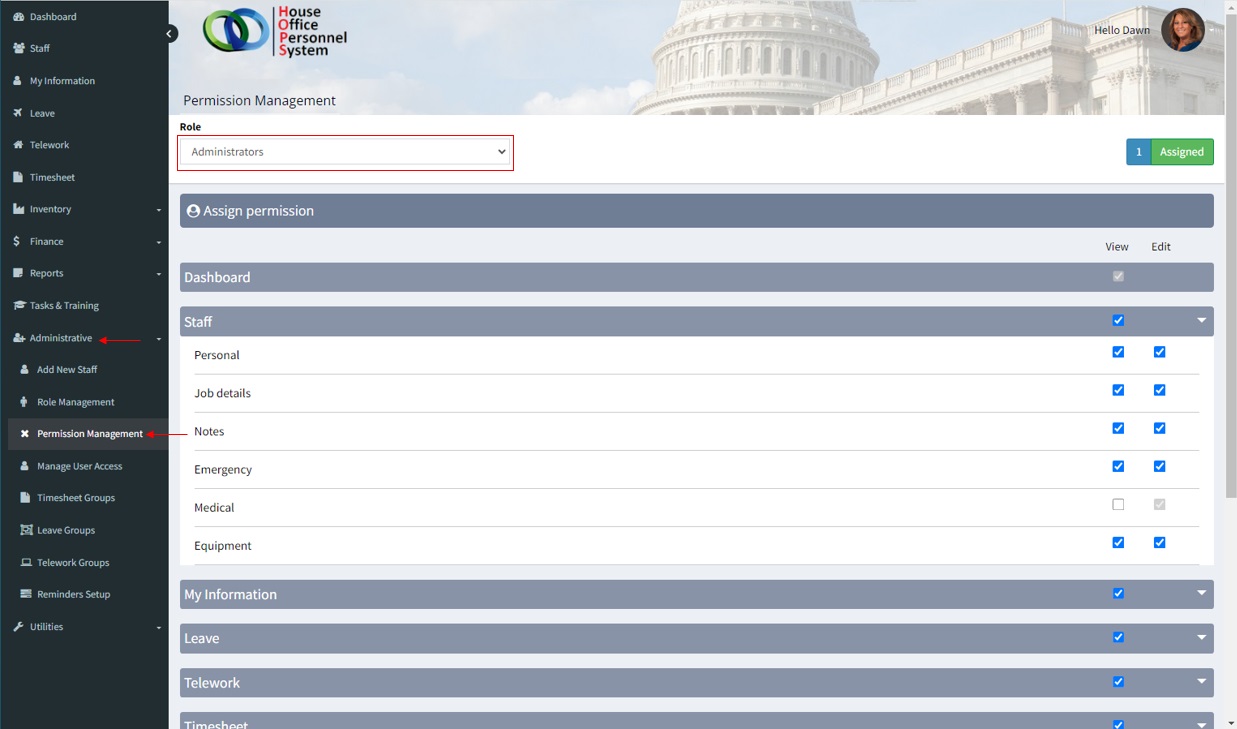
Note: You may notice in the example given below, the ‘Edit’ box is greyed out next to medical. To give the user editing rights, select the view box first to allow the edit box to become selectable.
Assign users to role
From the left navigation menu and select [Administrative -> Manage User Access].
- Under the Employee Name field, select the employee you want to assign a role to.
- Under the Role field, select the role you want to assign the employee.
- Select ‘Save Details’ to complete.

Change Role Permissions
Go to the left navigation menu and select [Administrative -> Permission Management].
- Under the ‘Role’ field box, select the role you wish to change the permissions of.
- Select the small arrow to the very right of the permissions group you wish to change.
- You will be presented with 2 columns of boxes you are able to select. These will grant the user access to either view or edit.
Note: You may notice in the example given below, the ‘Edit’ box is greyed out next to medical. To give the user editing rights, select the view box first to allow the edit box to become selectable.