Office Management
The office management page can be accessed by selecting [Utilities-> Office Management] from the left navigation menu. The Office Management page allows for management of the offices that staff work from. Offices can be added, edited, and deleted. Staff office assignments can also be managed.

There are 2 sections/tables that are displayed when viewing leave workflows.
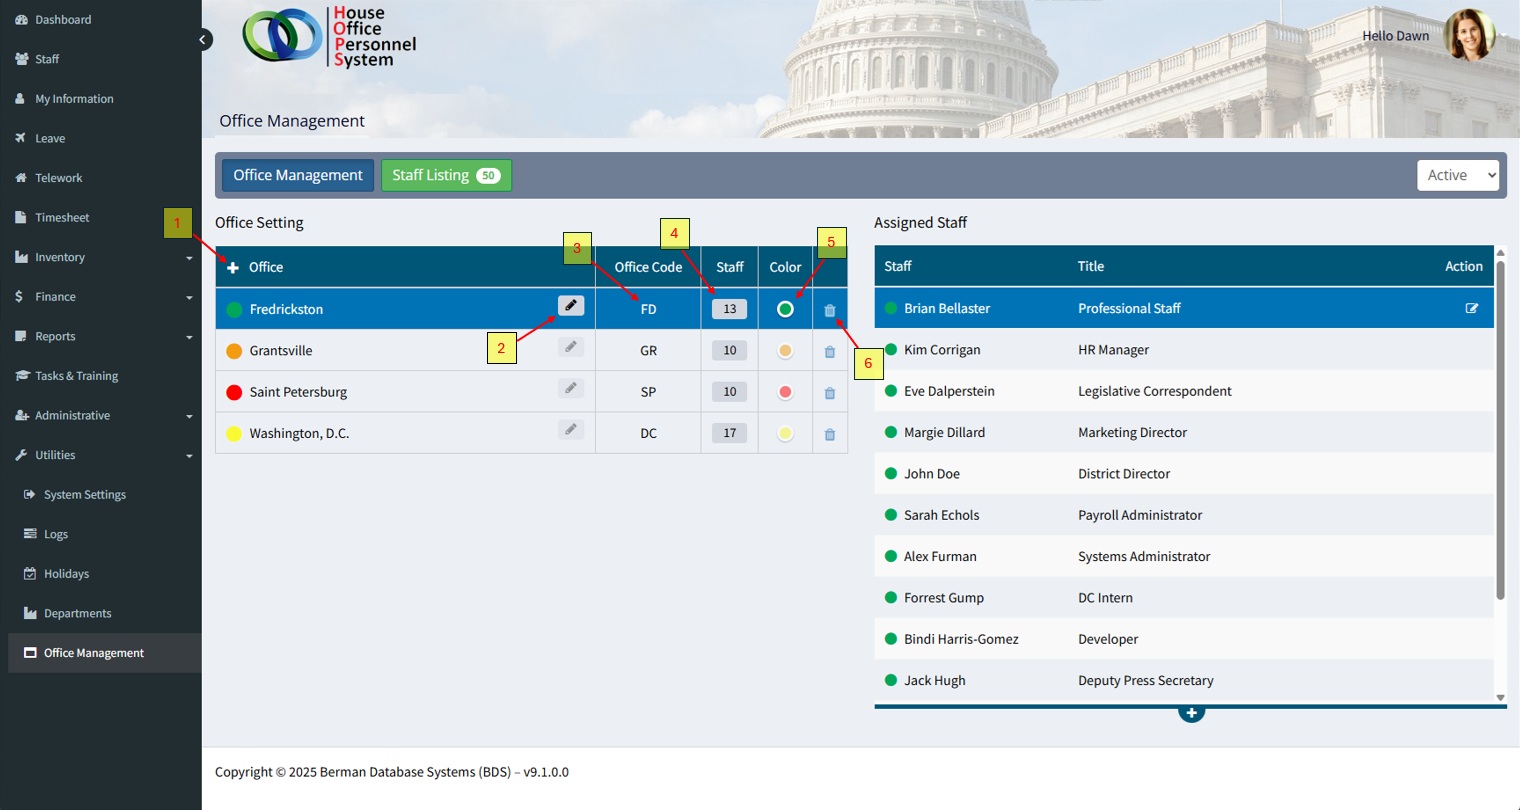
- Office – Add new offices, edit existing office details, office code, the number of staff assigned to the office, and the color selected to represent the office on calendars.
- Assigned Staff – Displays the staff that are assigned to the selected office and allows for editing of office assignments for staff.
Office
Selecting/clicking an office will display the assigned staff of the office in the table to the right.

- Add office: Click the add [+] icon on the right side of the header to add a new office to the office list.
- Edit office: Allows administrators to edit an office’s details, including its name, office code, location, and other additional information.
- Office code: An identifier that abbreviates the office name for quick reference, eliminating the need to spell out the full name.
- Number of staff: Current number of staff assigned to that office.
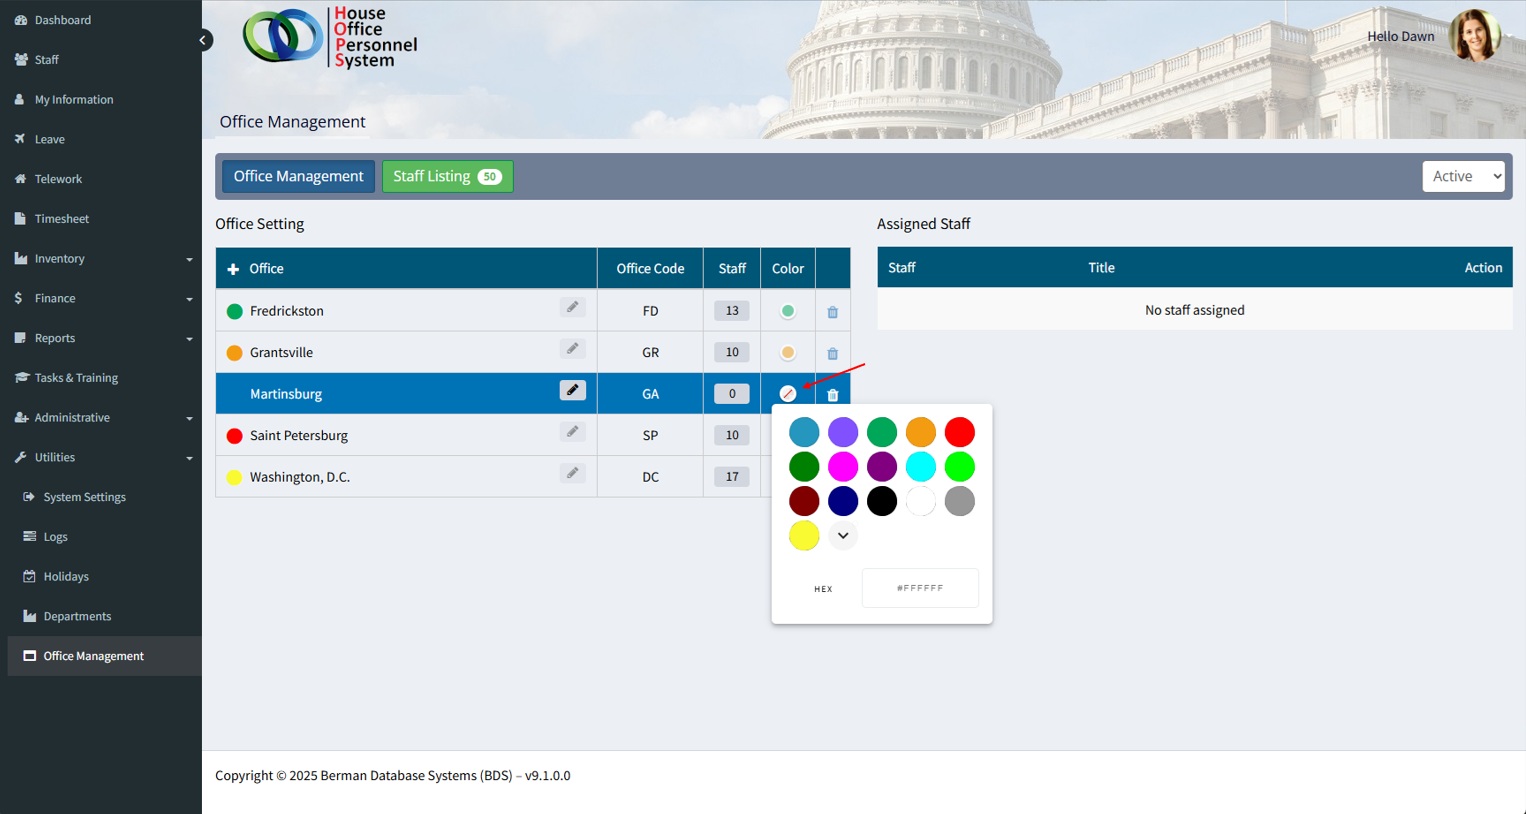
- Office color: Represents a quick visual reference beside each staffers on telework or leave calendar when configured to display current office assignments.
- Delete office: Click the delete icon on the far right of the selected group.
Note: An office cannot be deleted if staff are currently assigned to the office. Remove/re-assign staff before deleting the office.
Add Office
To add a new office, click the [+] button located next to the Office header.

Once selected, the user will be prompted to enter the location and office code. The office code serves as an identifier that abbreviates the office name for quick reference, eliminating the need to spell out the full name. Additional details, such as address, city, state, ZIP code, phone, and fax number, are optional.
Once all information is entered, select the save icon to complete the process.
A pop-up window will appear prompting to apply the holiday/admin days to the new office.
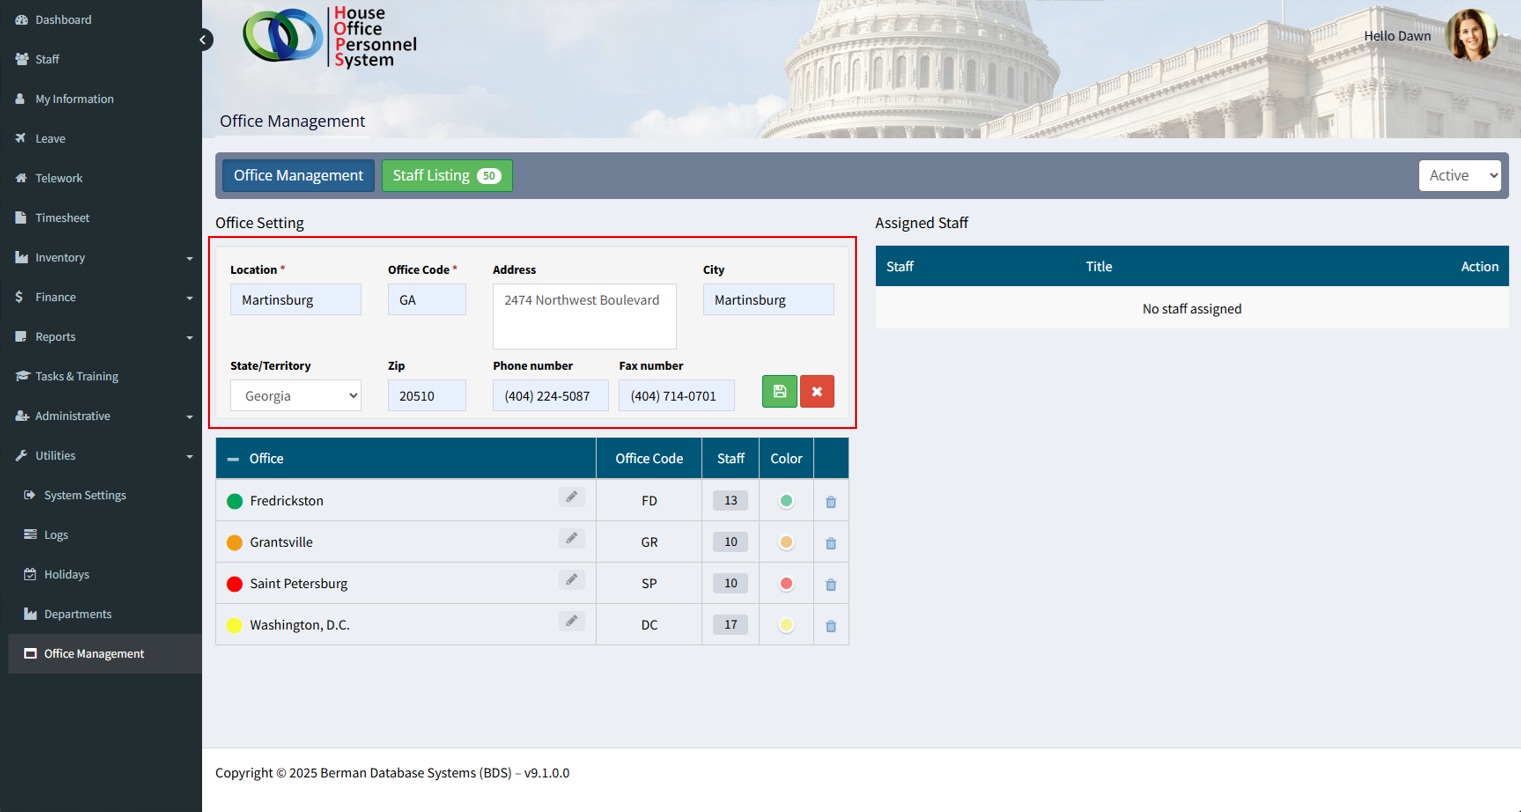
After all information has been confirmed, the new office will be added to the office directory.

Assign a color to the office as a visual identifier. The color codes are used as quick visual identifiers when users view the leave and telework calendars.
Assigned Staff
The ‘Assigned Staff’ table displays the staff that are assigned to the selected office and allows for editing of office assignments for staff.
- Office color: A quick visual reference of what office the staffer is assigned to
- Staff name: Staffers name
- Staff title: Staffers title
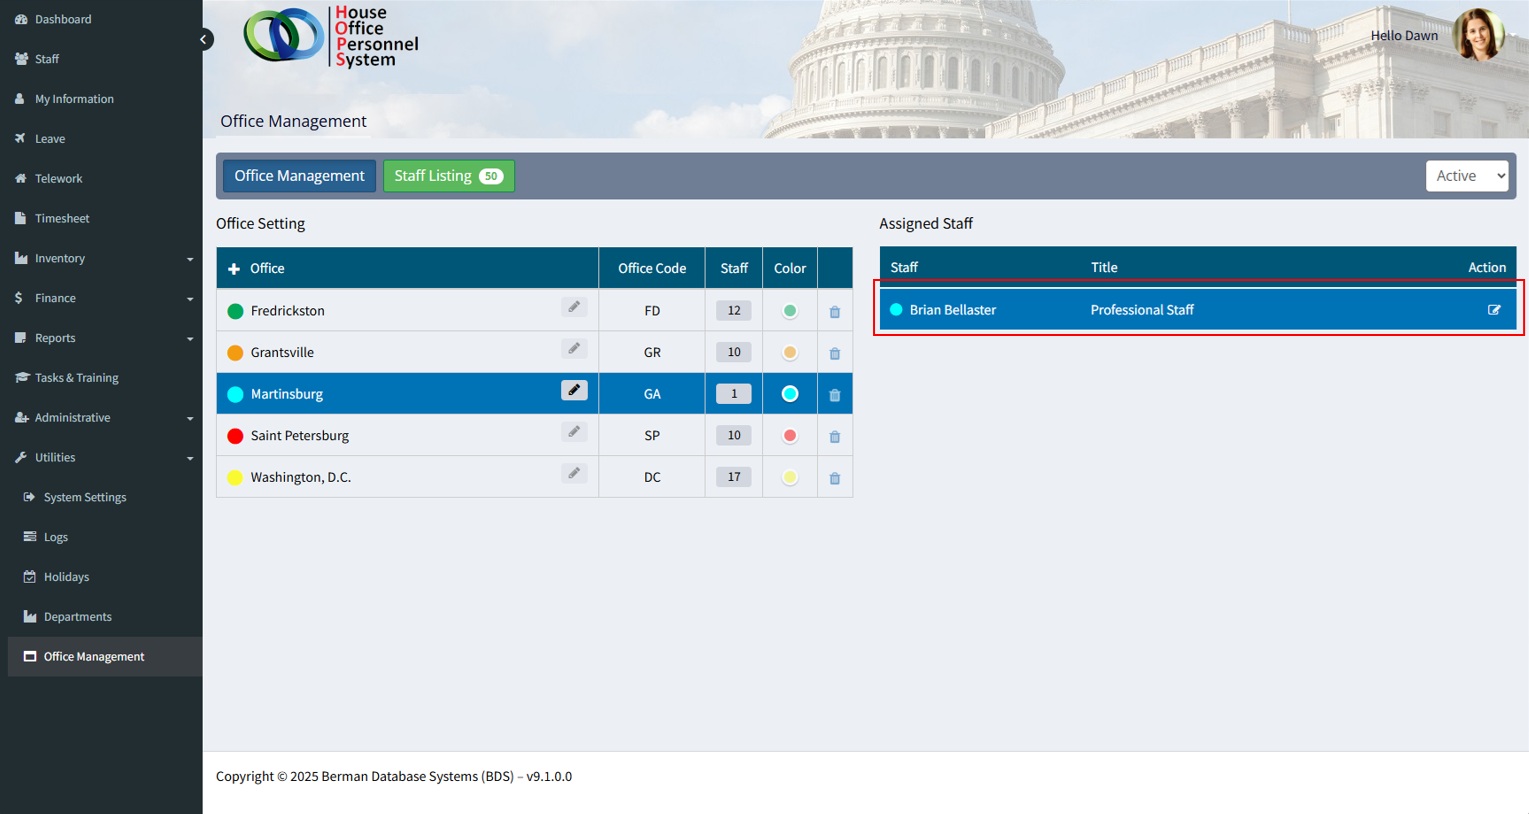
- Edit: The edit icon enables administrators to reassign staff to an office by selecting the desired office from the dropdown menu.
- Status filter: By default, the list of assigned staff will display current ‘Active’ staff. To view ‘Former’ staff, select the status filter (dropdown list) above the assigned staff.

Reassigning Staff
Administrators can reassign staff from either the ‘Office Management’ page or from the Staff Listing page.
To re-assign a staff members office assignment, select the office that the staffer currently is assigned to, locate and select the staffer in the list of ‘Assigned Staff’ and click the edit icon at the right side of the table. Select a new office assignment and click the save icon.
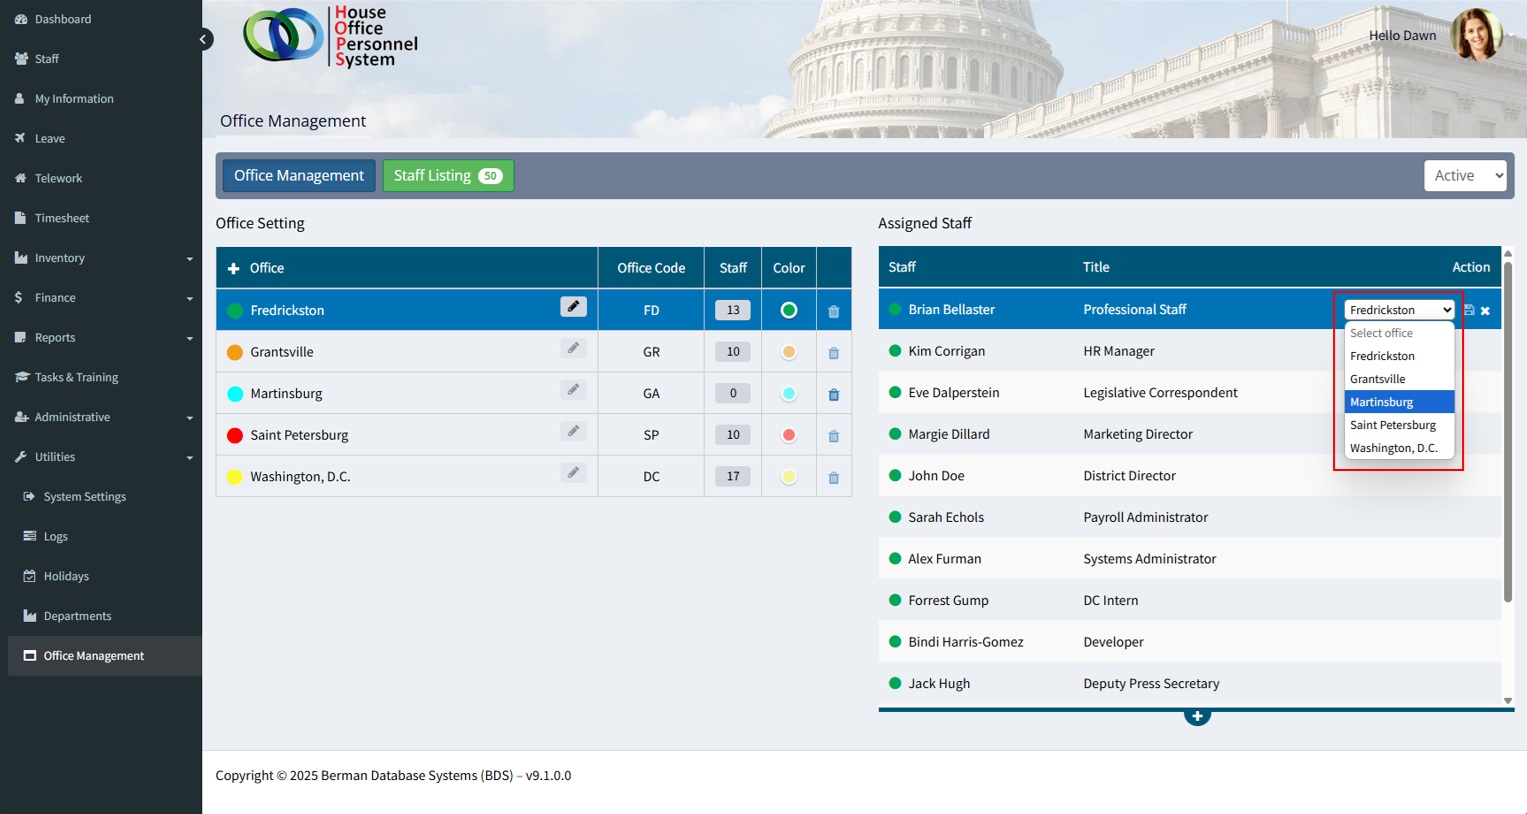
The staff member’s name will then be removed from the previous office’s staff list and added to the newly assigned office.
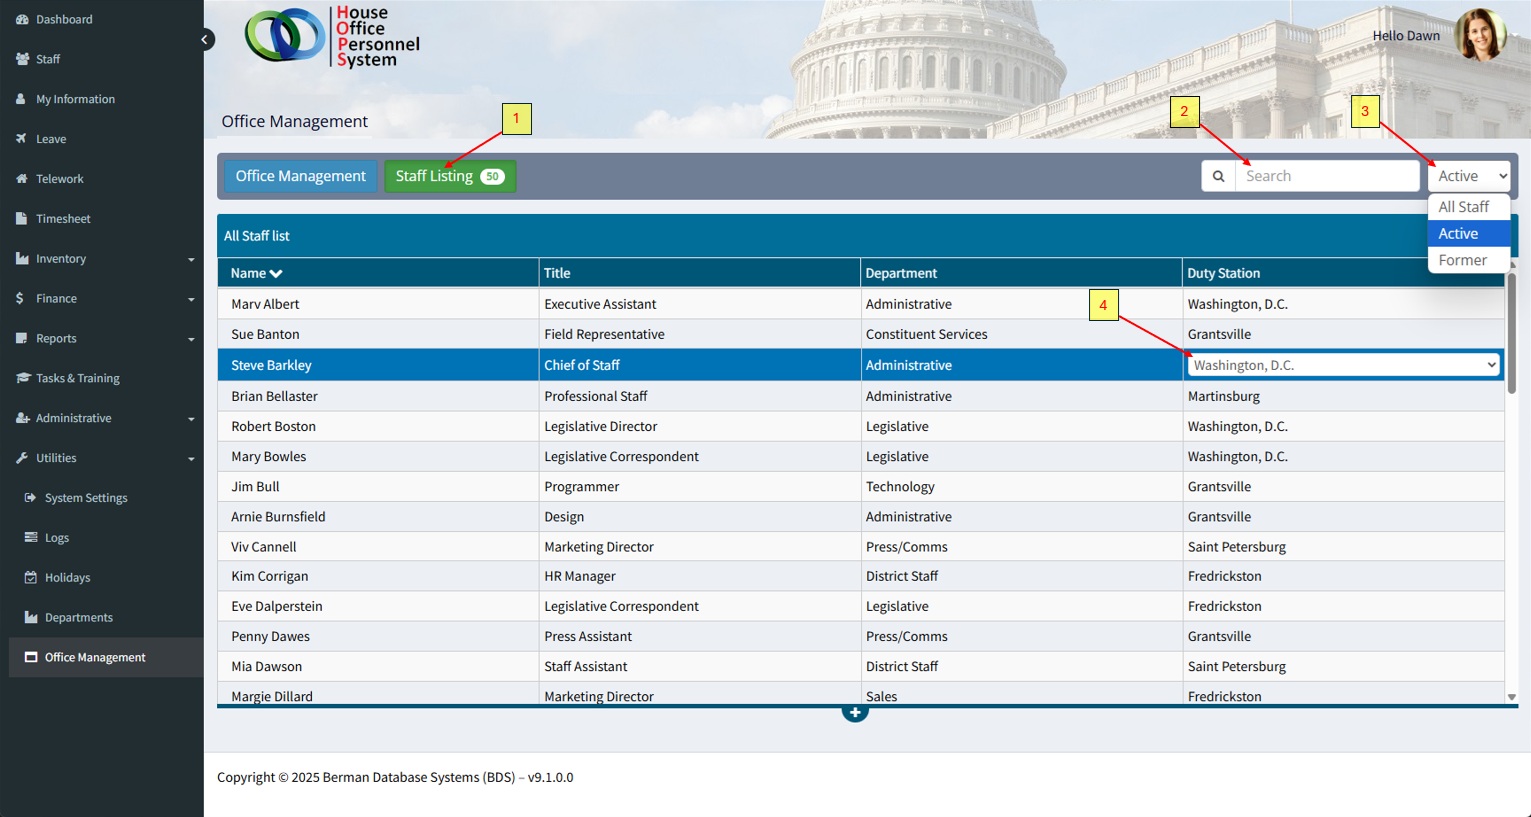
Staff Listing:
The ‘Staff Listing’ displays a list of all staff (default order is alphabetical). This allows admins to quickly locate, review, and change office assignments as needed.
1. Click the ‘Staff Listing’ button to display the list of staff. The number of staff are also displayed on the button.
2. The search field filters the list based on the keyword search. All columns are searchable.
3. The status filter options are ‘All Staff’, ‘Active’, and ‘Former’. The default status is ‘Active’.
4. Duty station assignments can be modified by selecting the staffer and clicking on the ‘Duty Station’ that they are assigned to. A dropdown list will display, and the duty station assignment can be modified. The changes are automatically updated/saved when selected.